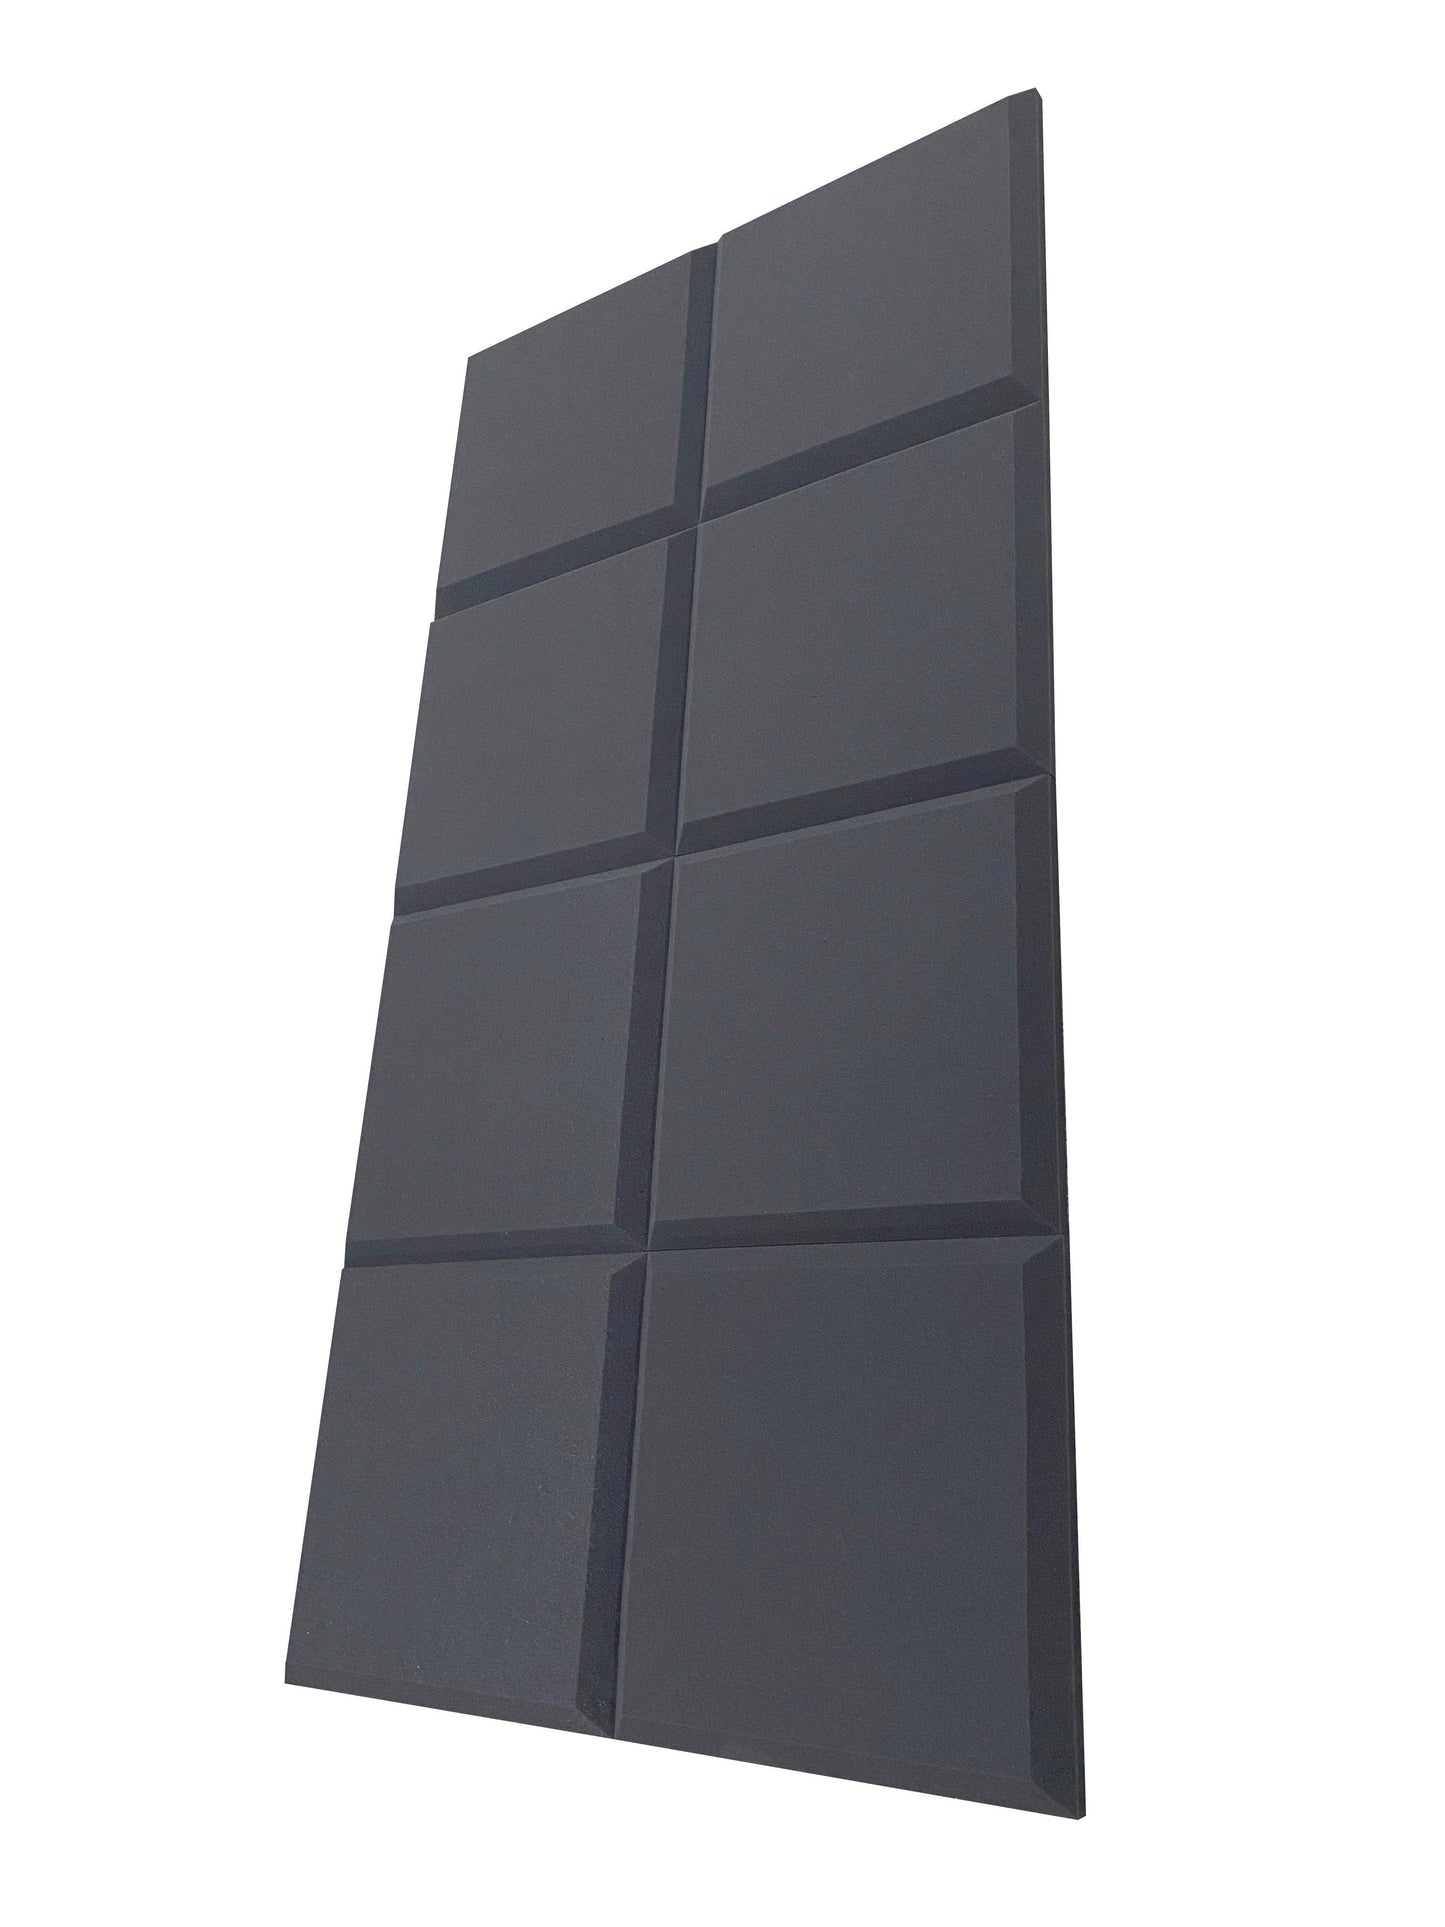
500mm x 500mm Square Golf Simulator Wall and Ceiling Foam Panels - 2sqm Pack
500mm x 500mm Square Golf Simulator Wall and Ceiling Foam Panels - 2sqm Pack
What's in the Box
- 📦 8 tiles per box
- 📐 Each tile: 500mm x 500mm x 50mm thick
- 📏 Coverage per box: 2 m²
Couldn't load pickup availability
How many packs do you need?
Enter your room dimensions and we'll calculate the exact number of packs, singles, and adhesive for your space.
Takes less than 60 seconds · adds everything to your cart
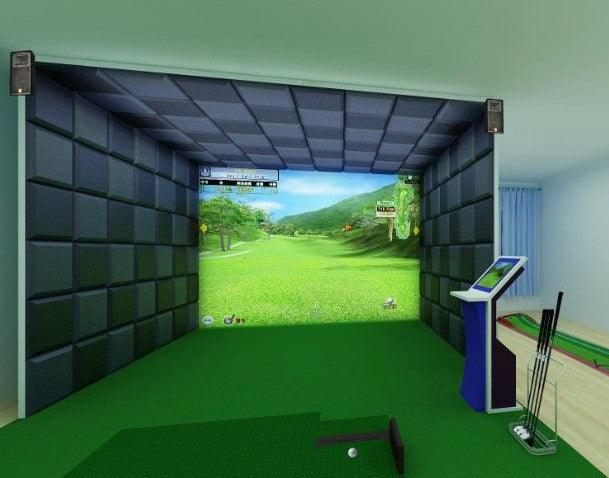
What These Panels Protect
- ✅ Walls and ceiling from direct ball strikes
- ✅ Reduces ball rebound and noise in the room
- ✅ Protects against repeated impact over time
Installation in 3 Simple Steps
Complete Your Kit
Don't forget the adhesive — panels won't stay put without it.
💡 Not sure how many tins? The Panel Calculator works it out for you and adds everything to your cart.
Placement Strategy for Square Panels
Square panels are a great all-rounder for side wall padding and ceiling protection, especially if you want a clean, symmetrical grid. The 500mm format makes it easy to plan coverage and keep the pattern looking consistent across different wall lengths. A full bay install means both side walls and ceiling are protected, creating a cohesive, finished look.
Calculating Coverage and Layout
Measure your simulator bay (side walls and ceiling) and plan your grid in 500mm increments. If the wall dimensions don't divide evenly, you'll typically trim the final column/row for a tidy edge. For the best look, install panels tight together with edges aligned, so the finish looks seamless.
Installation Best Practices
Start from a reference point (often the corner closest to the hitting area) and work outward. Use a level for the first row so the grid stays true. Apply the recommended spray adhesive evenly and press each tile firmly into place. With correct surface prep and adhesive use, panels will hold without additional support.
Frequently Asked Questions
- Q: Are square panels easier to install than other shapes?
A: Usually, yes. The straight edges and consistent size make layout and alignment simple. - Q: Can I install these on slightly textured walls?
A: Light texture is usually fine, but heavily textured surfaces can reduce adhesion. A quick test tile is a good idea. - Q: What's the cleanest way to cut panels?
A: A sharp utility knife and straightedge. Multiple, long, light passes tend to cut cleaner than one heavy pass. - Q: How do I calculate coverage for my space?
A: Measure your side walls and ceiling, then use the Panel Calculator to get exact quantities and adhesive amounts.
Shipping Information
Shipping Information
Your order will be delivered in 100% recyclable packaging, uncompressed and ready for immediate installation. We stock all products for quick dispatch and offer same-day shipping on orders placed before 2 pm, ensuring next-day delivery. As a UK-based company, we provide swift and efficient customer service.
Installation
Installation
Installation is hassle-free with our recommended spray adhesive, ensuring a clean and stress-free setup. The panels are also easy to trim to size for a perfect fit.
Returns
Returns
Order with confidence from Advanced Sims, knowing that we uphold the highest standards. If for any reason you’re not completely satisfied, return your products within 30 days in their original packaging and unused condition for a full refund.